Throughout this ongoing series on Scrivener so far, you’ve been experimenting with a blank project. I highly recommend my students learn first with a blank project so they can screw it up and experiment thoroughly before they start importing their own writing. Few listen. Either way, it’s time to talk about how to import your writing into Scrivener, and practice first on your experimental project.
There are two ways to get your content into Scrivener.
You can copy and paste from your word processor. Take care doing this as it will often bring in code and formatting that you might wish to remove later. You can also import the content directly into Scrivener.
We will cover both methods, but to do this right (or at least wiser), start with formatting a blank Scrivener project.
Remember, importing your writing into Scrivener makes a copy of the original files. It does not modify them. They remain untouched. Save them off your computer in a protected and secure place as backups.
Formatting a New Project
Go to Tools > Options > Editor.

This is where you format Scrivener for what you will use on the screen. This is NOT how the document will look when published. Get that thought out of your head immediately.
The Editor creates your writing environment. How do you wish to write? Single spaced lines? Double spaced? Wide margins? Narrow? Indented paragraphs? Not? Large fonts? Serif or sans-serif fonts?
With the Editor, you can set up a writing environment the way you wish to write. When the writing is compiled (exported), you may control the end result there.
Changing the formatting of the Editor is best done before you add your writing. It applies only to new documents, not previous ones. I’ll cover how to fix the older styles and formatting in another tutorial.
To change the styles of the document, select the formatting in the small toolbar above the demo text.
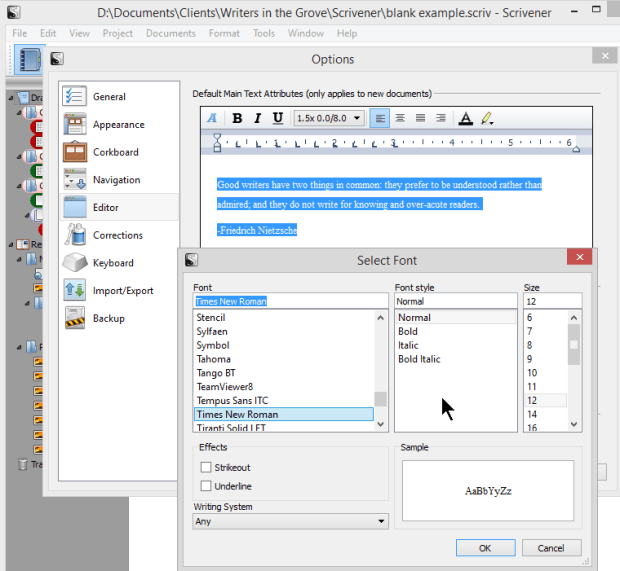
To change the font, click the first A.
To change the line spacing, click the drop down menu of numbers. The first number is the number of spaces between the lines, typically a variation like 1 (single space), 1.5x (1 1/2 spaces), 2 (double), etc. The second number is the space between paragraphs, and is usually displayed in font points such as 8pt or 10pt.
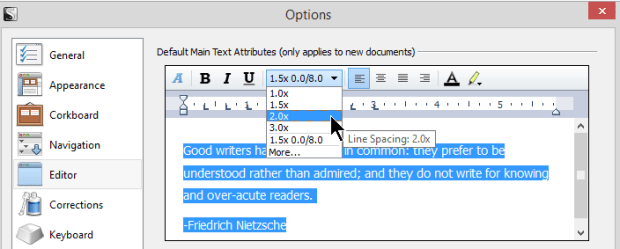
Click the More in the drop down menu to customize the indention and spacing more specifically.

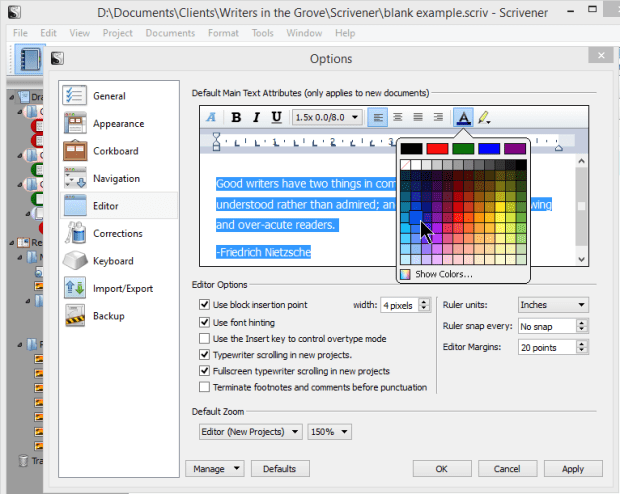
Some people like writing in a color different from black due to eye sight issues. If you wish to write in blue or another color, right click on the A with the underlined color.
At any time, click off the text in the editor to see what the text will look like. Select it again to make changes.
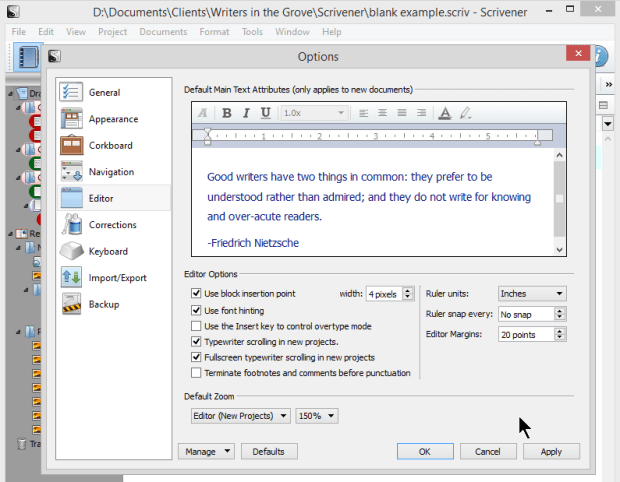
Underneath the Editor are other options such as controlling the scrolling, font hinting, block insertion point width, ruler units, etc. Most of these are familiar to word processor users.
Under the options is the Default Zoom. Scrivener will automatically wrap sentences within its window, and you can zoom in and out as you work on your writing, but why not start out your working environment with the letters zoomed in by default to a readable setting?
By default, the setting for the default zoom is 150%. I often like it at 200%. These eyes are getting a bit old and this makes it easier to read as I work.

If you would like to save these settings for future Scrivener projects, use the Manage option to save the settings. You can load them in the next project, or have different settings for different projects.
When done, click Apply and OK.
Remember, this may not be the final formatting on the document you export from Scrivener for printing, sharing, and publishing. When you export or compile the writing, you can control the look and feel of the document.
Copy and Paste Using Existing Format
If you choose to copy and paste your writing from a word processor or other source into Scrivener, you have a choice to use the styles and formatting already in what you are copying or paste in the content to match the format you set with the Editor.
To paste content as it is already formatted into Scrivener, simply add a new text document and paste it in.
To paste content into Scrivener to match the styles you’ve set with the Editor, keeping the look and feel of the content consistent throughout your project as well as presented the way you’ve chosen to work with it, paste it using the right click Paste and Match Style or keyboard shortcut CTRL/CMD+SHIFT+V.

In the example of a split screen view below, note the difference in the formatting. The text on the left features the new formatting set in the Editor. The text on the right is the default formatting set by Scrivener.
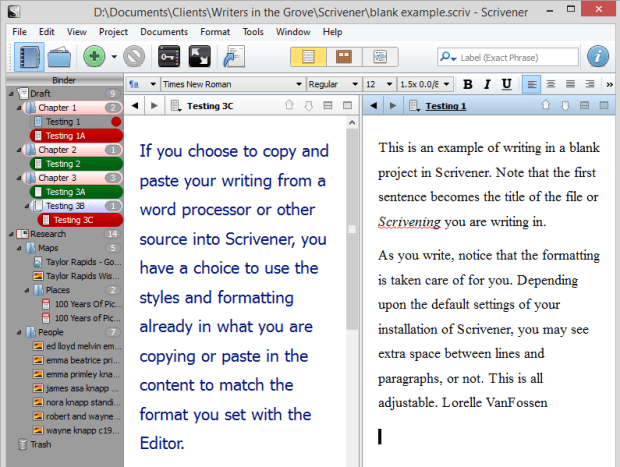
This is an example of how new content will match the formatting set by the Editor and old content doesn’t change.
Importing Content into Scrivener
Copy and paste is fine for a few articles, stories, poems, etc., but what if you have been brutalizing yourself in a 400 page word processing document?
What can you import into Scrivener?
Microsoft Office Word, OpenOffice ODT, PDF, DOC, DOCX, Text, RTF, HTML, Final Draft (FDX), OPML, MM (Mind Map), and other word processing and text-based formats.
The power of Scrivener is to be able to segment the content into workable chunks, manipulating the content as you work on it. You are moving away from working with word processors to save yourself. The last thing you need is a huge single file in Scrivener.
There are two ways to break up content in Scrivener. The first is through the import process and the second is manually. Before we get into the specifics of splitting the content into sections, let’s figure out how to import the document into Scrivener.
The process of importing into Scrivener allows for a single document or a document with symbols or code to split the document into sections.
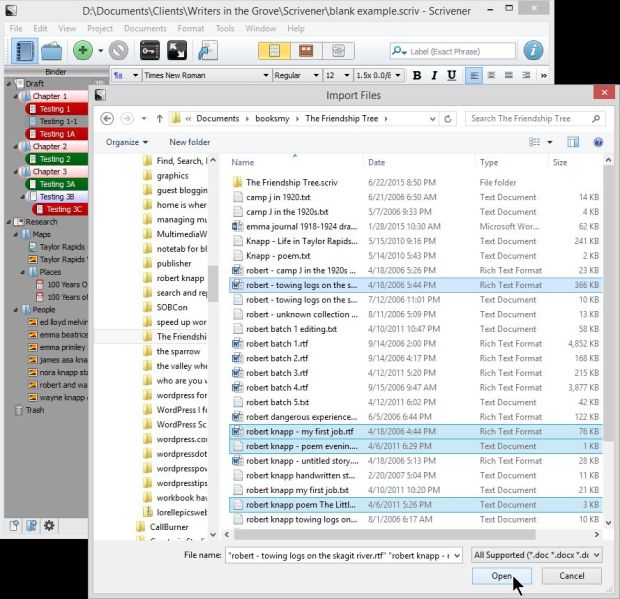
To import one or more documents into Scrivener:
- Click on Draft or the chapter or section you wish to have the documents sit in your Binder (you may move them later)
- Go to File > Import > Files
- In the popup file manager, navigate to the files and select one or more of them
- Click Open

Selecting multiple documents in one import makes it easier and faster to import them.
Scrivener will import the files individually with the title the same as the file name. You may change this.
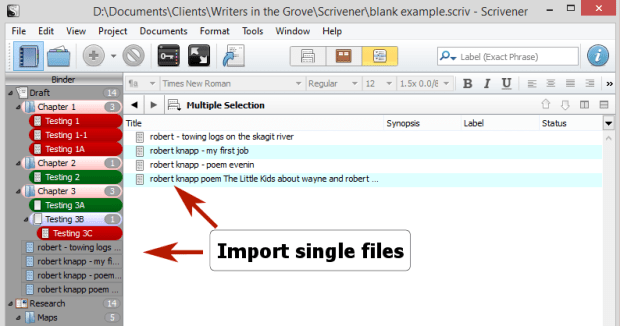
Click and drag the files around in the Binder to where you wish them to be. If you need to add folders, do so to keep your content and writing organized.
To split any of these documents into smaller sections, you will use the Split feature in Scrivener to split them manually. Consider doing this experiment in the blank experiment project first.
In one of the sections of a Chapter, place your cursor between two paragraphs, typically at the start of the second paragraph.
Right Click and choose Split at Selection or use CTRL+K on the keyboard.

This splits the document into two. The new title of the new document features a dash one such as Testing 1-1. You may change it.

To let Scrivener automatically slice and dice your document into multiple sections, you will use the import feature that will divide up your document automatically.
Import and Split a Document in Scrivener
To import and split a document using the split import feature in Scrivener, you must first prepare the document you are going to import.
Scrivener looks for a character to indicate this is a splitting point in the document. This involves placing such a unique character into the document before you import it into Scrivener.
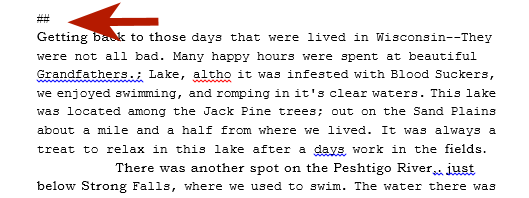
The most common symbol is # or ##, a symbol you do not use in your writing. The line with the symbol will be removed by Scrivener and the document split at that point.
To add such a symbol to a Word document, you can manually add it between each chapter, or do a search and replace. This involves searching for a page break manually added to the document between sections, thus you need to use the Special Characters in Word to find the page breaks and replace them with the ## symbols.
- In the document, initiate a search and replace
- In the search form, type in ^p (the ^ is SHIFT 6)
- In the replace form, type ^m##^m (this means replace with a line break, ##, and another line break)
- Initiate the search and replace
- Check the document to ensure it worked, and if not, press CTRL/CMD+Z to undo and try again

In WordPerfect, you do the same, however you choose the code from a list.
- In the document, initiate a search and replace
- Select Match Code and choose Hpg for the character to search (Hard Page Break)
- Switch to the replace and choose Match Code and choose Hrt then type ## then choose Hrt again (Hard Return ## Hard Return)
- Apply the search
If you are using another program or word processor, check the help files for the character used to represent a page break and replace that with lines in and around it to ensure the ## symbol is on its own line.
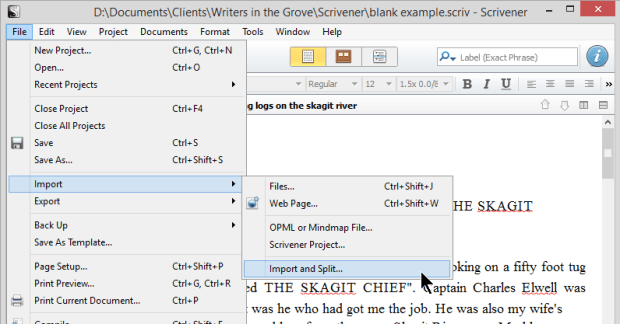
In Scrivener, go to File > Import > Import and Split.
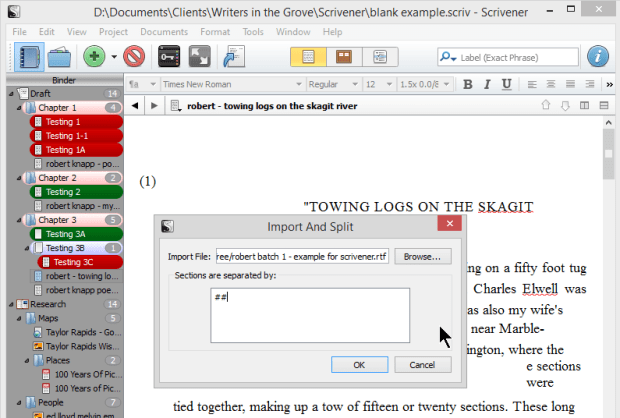
- Click Browse to locate and open the file you wish to import
- Type in the separating symbols, in this case ##
- Click Okay
Scrivener will import the file and separate each section at the symbol. It will also title each section automatically with the first words on the section.
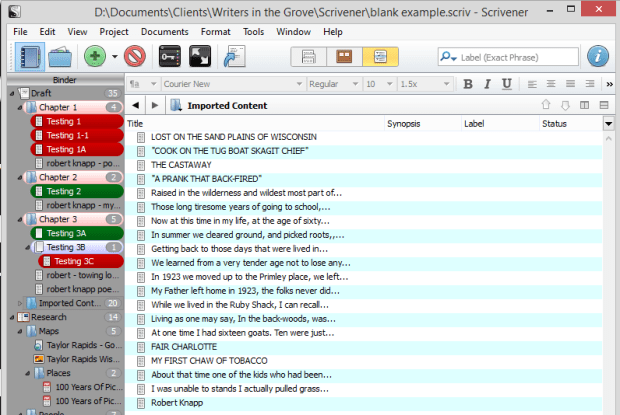
You may change the titles, apply labels, status, and other organizational features to each section, and move them around as you need.
Again, experiment with this in your blank experiment Scrivener project before importing into a final project. Play with splitting documents, renaming them, moving them in and around, just to get the feel of how this all works. Once you are comfortable with this, then create a new project and import your writing.

One comment
Comments are closed.